
| Q. 1. How thick should the glass for a telescope mirror be? | |
| A. Not less than 1/8 its diameter, or it may not hold its shape; not greater than 1/6 its diameter, or it changes form excessively with changing temperature. It also is slower to reach an even temperature throughout, requiring long waits when testing. | |
| Q. 2. Must glass be perfectly circular? | |
| A. No, this is not important. I have been unable to see any effect of even an eccentricity of 1/8 inch in a 6 inch disc. This is a good thing for the amateur telescope maker; as it is almost impossible to get glass really round from the maker. Of course the glass can be edged on a rotating table, but this is an expensive operation requiring apparatus. | |
| Q. 3. How fussy should one be, in preparing pitch laps for polishing? | |
| A. The temper of the pitch should be right. If it is too hard it will be hard to keep the contact between the glass and the pitch. It is also very hard to parabolize with a hard lap. A soft lap is even worse, however; for such a lap invariably produces a turned-down edge and a hyperbolic mirror. Tempered pitch has been prepared for use in a room at a temperature between 65 degrees and 85 degrees Fahrenheit. In a colder room, turpentine must be added to the pitch to soften it; while a warmer temperature requires the addition of rosin to harden it. To test the temper of your pitch, press hard with the thumbnail; it should mark faintly. Another test is to chew a small chip of pitch; it should crumble at the first chew and then pack in not more than six chews. Another important thing in using the lap is to maintain good contact. Place in warm water (120 degrees F) for a minute or two before starting to polish each day. How the lap is cut is unimportant. You can cut beautiful squares with accurate grooves, being careful to keep the center of the middle square away from the center of the mirror, as the old-timers did; or you can forget it and simply scratch the surface of the lap with the point of a knife into 1/4 inch squares. The first method may require several hours, while the second takes about a minute, and works just as well. Another way, invented by Alvan Clark is to drill a series of hole in the pitch lap, spacing them by eye about an inch apart. Connect them by scratches to distribute the rouge that is stored up on the drill holes. Any method is all right. All you need is a pitch surface in accurate contact with the glass with scratches or grooves to break up the surface and decrease the suction. Personally I form my lap as follows: put it into hot water and press into about one inch squares, using the edge of a 12 inch steel scale. Then reform by pressing with the concave mirror, and use the scale again to open up the grooves that press shut. This makes a beautiful appearing lap much more quickly than you can do with a knife or hacksaw. However, it will do no better work than other methods. Bubble in a lap do no harm so long as they are fairly evenly distributed. | |
| Q. 4. What eyepiece shall I get? | |
| A. The 1 inch eyepiece is the most generally used. It can be used satisfactorily on even a poor night, when high powers are useless. It is best for variable star observing, as it gives a large field of view. | |
| Q, 5. What focal length mirror shall I make? | |
| A. The 6 inch diameter mirror of about 48 inch focus is a favorite with amateurs, as it is light and easy to handle and makes a compact powerful telescope not too large to be easily portable. A focal ratio of f8 gives shadows easily seen in testing. However, mirror of a longer focus give more power and, with a little experience, even the faint shadows on a 6 inch mirror of 90 inch (f15) can be easily interpreted. I have made mirrors with focal ratios from f3 1/3 to f18, and have found them all satisfactory. For a large field, make a short focus mirror. For great magnification, make one of long focus. A happy medium is our old friend f8. | |
As it is necessary to move the telescope to follow the stars during such an exposure, Mr. Lower has another telescope ... a 12 inch Cassegrain (also home made) mounted alongside the other on the same mount. Either telescope can be used to guide with, while the other is photographing: giving a chance for either faint objects with the 54 inch focus scope, or high magnification with the Cassegrain.
 |
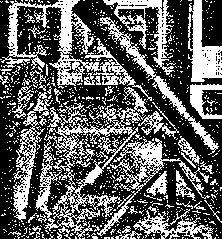
Notice in Fig. 3 how Mr. Passiglia use stock pipe fittings to make a very serviceable pedestal for his 6 inch reflector. A good suggestion for a portable mount. |
 |
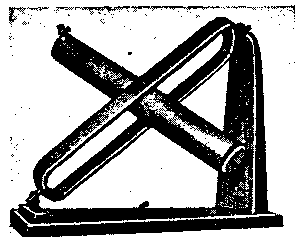
Fig. 4 shows the parallactic ladder type of equatorial mount. The axis of the double yoke is parallel to the Earth's axis. This type of mount is a favorite with the Pittsfield crowd.
|