|
|
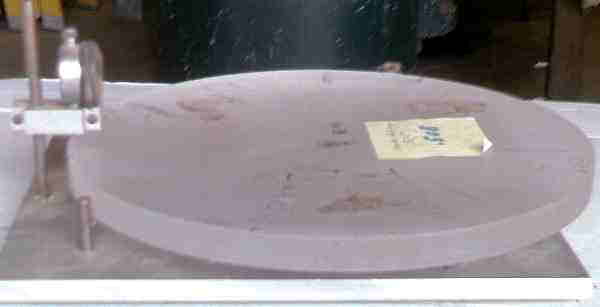
The lens shown in the photos is a 13.2 inch diameter piece of glass to give you an idea of how large the tools are.

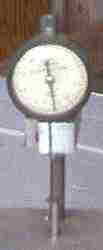
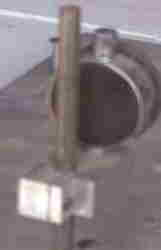
The first tool that you need is an edge measuring tool. This tool locates the glass in such a fashion that you can measure the thickness of the lens near the edge of the glass. Basically is consists of 3 support points for the glass and two locating pins and a relative measuring tool supported above one of the support points.
 Start by getting together the base plate of the tool and the indicator bracket and clamping the bracket to the base plate. The drawing at the right shows how the bracket is done. Drill two holes in the two pieces with a drill smaller than the bracket support rod or the indicator shaft diameter. This is so that you can later drill the two holes so that they will fit tight. Drill the holes far enough apart so that the indicator can be rotated in any direction as necessary to read the instrument. I used the clearance drill size for the screw that I used to hold the rod in place on the plate.
 After you have drilled the holes, you can then enlarge them as needed. For an instrument that can work with 5" and up lenses, I used a 3/8" rod for the support so I then opend the hole in the base about 1/2 of the way through in the base as shown in the detail drawing to the right. I then inserted the rod into the hole and then drilled a tap sized hole in the end of the rod. Then you need to tap that hole in the rod with the proper tap. Those that are good machinists can do a pressed in rod if desired and the material of the base is thick enough.
 Next is to make the clamps on the indicator bracket. These are simple operations where you cut a slot from the end of the bracket after tap drilling a hole crossways to the cut. The tap hole needs to be drilled first, followed by the cut, drilling one side of the hole you cut to the cut with the clearance drill (use a size or two larger than normal for a clearance hole to allow for the closing of the end of the bracket which will cock the screw in the clearance hole) and finally tap the hole. Tap the hole from the edge of the bracket so that you don't have to shove the tap into the clearance hole. You may also want to then cut a notch out on the clearance hole side if you want to allow for a shorter screw to be used. Use a screw that screws most of the way through the tapped hole or you may pull the threads out of the hole. When you're done, you should be able to easily clamp the appropriate shaft in the hole without any problems. If needed, you may want to saw an additional cut to slightly weaken the strength of the bracket to relieve stress on the screw. That is the slot that comes in from the edge of the bracket and it allows the bracket to bend easier around the rod. The drawing above shows the basic appearance of the bracket.
Next open the indicator hole in the bracket to the diameter needed for the indicator. I needed 3/8" for this hole as I used a 0.0005" dial indicator for this measuring of the thickness of the glass. Also open the hole in the base for the pin to the size that fits the pins that you're going to use.
Next is to mark some dimensions on the base so you can drill the rest of the holes. Start by marking the centerline from the pin out to the other edge of the base. Mark a point that is the radius of the glass minus about 1/4" or so along that line and then use that cross point to draw a circular line that will be the circumference of the glass that you're using.
With those lines marked, you can then drill for the other two support points inside of the circular line to support the glass on the base. I used some aluminum rivets that I had laying about for the pins to support the glass. The rivets just sit in the holes as gravity does a good job of holding them in place. You really want something hard enough to keep any grit from working into the material of the pin or you will tend to get scratches on the bottomside of the glass.
Finally, you need to put a hole on either side of the measuring point so that the glass is held in place so that the measuring point is always a certain distance inside of the edge of the glass. Since I already had some 3/8" rod at hand, I just made two holes that were like the indicator support rod as I was going to be wanting to measure for several other lenses. Put the edge of the rod on the outside of the circular fine you drew and about 20 degrees of angle from the measuring pin or so. Like most of this, you don't need to be very accurate for the angle although you do want to try to be close to the line for the rod. Any inaccuracy here will change the distance in from the edge that you will be measuring, something that isn't important for distance other than you want to measure near the edge. Any particular tool will be used only on a certain piece of glass and you won't be using the tool to measure one sport and another tool to be measuring another spot on the glass. It isn't an absolute measurement here but a relative measurement around the glass that is important with this tool.
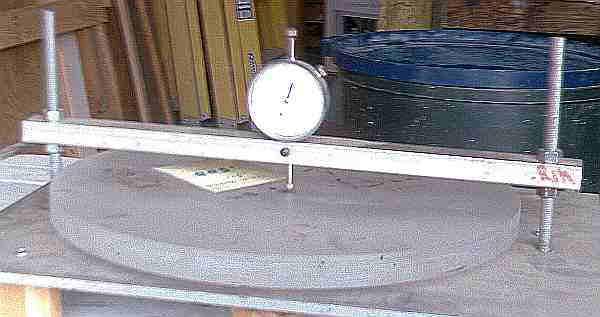
Assemble the tool with the two stop rods and the three support pins and finally the parts to support the dial indicator. Set the dial indicator so that it can measure the thickness of the glass that you are interested in measuring the wedge of and insert the glass and push it up against the rods and see what it measures.
To measure, insert the glass into the tool under the measuring indicator and up against the two stop rods and see what the indicator measures. Lift and rotate the glass and measure in a fair number of other locations and see if they are all the same. Odds are that the different points will show that there is some wedge in the glass by indicating that one side of the glass disk is thicker than directly opposite. Mark on the glass with a pencil, grease marker or magic marker the various measurements so you can easily see visually where the high spot of the thickness of the glass is and mark that on the side of the glass so that you can then use it as a reference for the following special grinding. For coarse grinding grits, being within two or three thousandths of an inch will be close enough because there will be some error in the measurement due to the size of the pits in the glass. By the time you get to 25 micron grit, you should have the final correction of the wedge done. Most designs want that error to be less than 0.0005" so plan accordingly.
When doing this special grinding, this is the one time that you don't want to turn the glass as you are wanting to grind off one side of the glass more than the other. In the case of one lens set that I've made, I had to take off 0.0035" of both glasses so, as a result, I ground the high side of both of the glasses together until the glass edge was consistent all the way around. Both glasses got real close this way with one having just a little bit counterclockwise on the grinding surface as the grinding progressed, probably because I didn't find the true high spot in the glass edge. When you have one glass correct and the other glass is off, you have to grind that glass with the wedge in it preferentially on one side while the other glass is rotated to keep it even. When you think that you're done with the grinding out of the wedge error, do a few wets and verify that all of the surface of the glass is being ground evenly and is spherical, thus making the surfaces spherical. Finally check the edge thickness one last time to verify that the wedge is fully taken out of the glass. This final step should be done at the 12 micron grit stage.
Another comment when using the tool is to lift the glass before turning and reinsert it into the tool or you may get some grit on the support pins and scrape a ring on the back surface of the glass. After you are sure that you have all of the wedge out of the glass, you can then safely finish grinding and polishing both surfaces. With lenses, it is best to keep the two surfaces at the same grit size so that any grit from one side won't scratch the other side
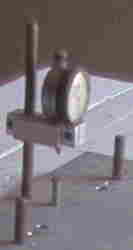
 The next tool is the center thickness measuring tool. This tool is really nothing more than a bridge over the glass supporting the lens. This tool does want to measure the absolute thickness of the glass but doesn't need to be as accurate and a 0.001" dial indicator will be enough.
Start by clamping the support bridge to the base and then drilling a pair of holes at the ends of the support bridge through to the base. For this application, I uses some 3/8" threaded rod so you need to drill for the clearance hole for the threaded rod. Then drill a hole for the indicator and the reference pin on the base. You will probably want to just start the hole on the base with this hole and then finish drilling followed by the procedure of making a threaded hole in the end of the rod. The alternative is to use a screw with a capped head for the indicator or glass to sit on.
Remove the support bridge from the base and tap the base for the threaded rod. Don't go all the way through with the tap and you will nicely make a hole that will accept the threaded rod but will hold onto it tightly in place and not need to do any other work to hold it in place although a locknut is always wise.
Drill the holes for the bridge to the necessary sizes, the side holes to the clearance for the threaded rod and the center for the indicator. Drill a hole for a clamp for the indicator and tap the hole. I used a 6-32 screw for my clamping screw. If you drilled the hole for the indicator cleanly, the single screw will hold the indicator without any problems although those who drill way oversized will want to drill for two screws to press against the indicator at about 90º against the shaft of the indicator.
Lastly is to drill and tap three holes for threaded rod to support the glass in an approximately level position. The threaded rod needs to be adjustable for the various pieces of glass and one of them should have a knob on the bottom so that you can adjust the support so that the glass doesn't rock about yet isn't being lifted by the supports.
Assemble the tool by putting the reference pin into the base along with the three side support screws, threaded rods into the base, the indicator into the bridge and slipping the bridge down onto the rods, locking it in place over the reference pin so that it measures. I put a knob on one of the three support screws so that I could adjust the screw to bring the support so that it allows the glass to rock just a little bit and thus not lift the glass from the center reference pin."Last is to put 3 feet on it so that the instrument is stable on the bench. It really isn't nice to have an instrument with one foot in the air and rocking back and forth.
Measurements are done by putting a mark in the center of the lens and putting the lens into the tool with the mark under the indicator. Adjust the third support of the lens (and the other two for a gross leveling of the lens) so that it is pretty much holding the lens in place and the lens only rocks a very little bit. This is to get out any last measurement error from a tilted lens. The indicator will indicate the thickness of the lens at that point.
The last tool to make is the edging tool. This can be done with a grinding machine like the Mirror-O-Matic grinding machine as a starting point. I won't go deeply into the grinding machine as there are good instructions already for this machine and it is a very useful machine for grinding and polishing glass. I'm merely going to be showing the necessary additions to the machine to allow for edge grinding.
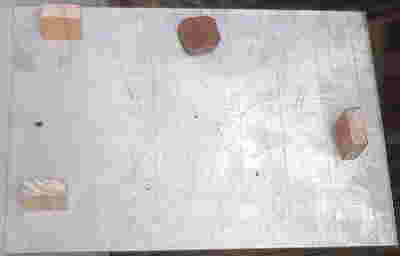
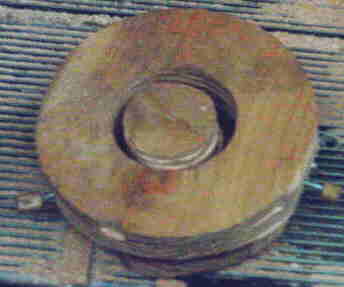 The first part is to make up an adapter to the table to hold the glass so that you can grind the glass. This adapter holds the glass with the outer ring and allows for the adjustment of the center of rotation of the glass relative to the center of the adapter. A wide piece of 2" thick wood or built up plywood to at least 2" thick is best used and you want to have the diameter of the piece to be slightly smaller than the glass to be ground. Cut the wood so that you have a smaller circle within a solid ring. You want to have a fair space between the two pieces. This requires the use of a sabre saw or other such saw that will cut from a drilled hole in the wood. I used a router to do the adapter shown and had to route from both sides to get all the way through but that gave me plenty of space for centering.
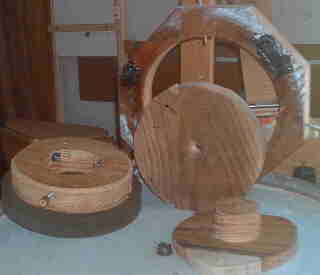 Finishing up the adapter by drilling three holes at approximately 120º points and placing ;a 1/4"-20 T-nuts on the inside of the ring and threaded rod long enough so that you can still adjust the rod when it is pushing the center section to the far side. A wood knob on each of the rods will make adjusting them nice and easy but remember that you don't want to go above the height of the adapter to keep the knobs from hitting the grinding tool. Shown in the photo are two tools that I've made, the larger one for the 13" lens blanks and the smaller for a 8" lens blanks for a refractor. The lens shown in this section is the 8 inch crown blank which was waterjet cut to size.
The other part that needs to be done is to provide a piece of iron or other such metal to do the grinding with. You may alternatively prefer to use a diamond or other grinding stone to bear against the edge of the glass.
A vertical 2"z2" can support the horizontal bar which is put on a hinge at one end. The other end needs to be movable so that you can apply pressure to the grinding operation. Another 2"z2" can be used on the other side and clamped onto the side of the machine so you can apply a wedge between and allow the horizontal bar to support the grinding surface to the glass. No more detail is going to be given as different machines will end up needing different lengths and so forth so measuring any particular machine setup would be basically a waste of time. The pictures should well describe how things work well enough.
 |
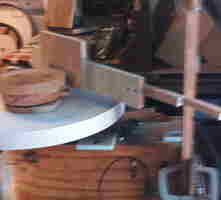 |
Slowly rotate by hand and adjust the 3 adjusters so that the glass is centered as well as possible on the turntable. Center the smaller piece of glass and that will make for less grinding as most of the grinding will be done on the larger piece. Usually the glass isn't fully round when you get it from a place that casts the glass or cuts it on a waterjet machine. If one piece is larger than the other, you want to center the smaller piece of glass in preference to the larger piece as you don't want to remove any more glass from the diameter of the smaller piece than what is necessary to make the two pieces the same size. The use of a dial indicator from one of the other instruments can help get the glass centered.
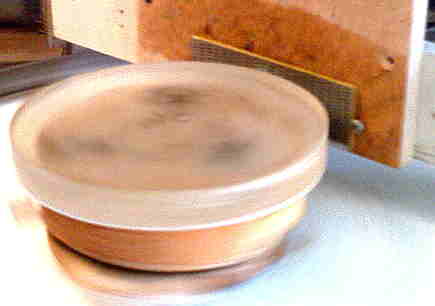 Next is to setup the arm that carries the grinding surface so that it is in gentle contact with the glass and start the machine. If you're using a diamond coated plate, you'll quickly find that the diamonds will quickly dig a ring around the glass and then stop rapid cutting. What this means is that the plate needs to be constantly moved up and down a bit to keep the diamonds hitting all of the high spots.
As you're going along with the grinding, you will find that the bar carrying the grinding surface will need to be moved closer to the glass and that is the purpose of a wedge so that you can easily control the force on the side of the glass.